|
|
|
|
|
|
|
|
|
Cranston Fine Arts  Military Art and Artists Featured Current Military Artists Brian Palmer Military Art and Artists Featured Current Military Artists Brian Palmer  Postcards Postcards |
[UP] - Ancient Era - Medieval Era - Napoleonic Art - American History - Zulu Wars - World War One - Original Paintings - Postcards |
| Navigation | |
| Page 1 of 3 | Page 1 .. Next |
|
|
|
|
|
|
|
|
|
|
|
|
|
|
|
|
|
|
|
|
|
| Navigation | |
| Page 1 of 3 | Page 1 .. Next |
| Text for the above items : |
Alexander the Greats Victory at Hydaspes River by Brian Palmer. (PC) Alexander the Greats Victory at Hydaspes River During the Macedonian conquests in 326BC at the tributary at Hydaspes (now Jhelem) of the Indus River, King Porus and his Indian army blocked Alexander the Greats advance with some 50,000 troops leaving 40,000, the bulk of his army, on the west bank of the river. Alexander the Great crossed the Indus river using makeshift pontoons with 14,000 picked cavalry and infantry. The following day he attacked the flank of King Porus position, after 8 hours of hard fighting, Alexander the Greats army routed the Indians, taking 9,000 prisoner including King Porus and killing 12,000. The Macedonian army lost 980 men and this was the last battle of the Asian conquest as Alexanders army rebelled and refused to go further. |
Charge of the 2nd Carabiniers against the Square of the 23rd (Royal Welsh Fusiliers) at the Battle of Waterloo by Brian Palmer. (PC) No text for this item |
The Revolt of Owain Glyndwr. The Battle of Pilleth 22 June 1402 by Brian Palmer. (PC) In 1401 Owain Glyndwr began a campaign for Welsh independence. He was crowned Prince of Wales at Carrog on the banks of the Dee and set up a parliament at Machynlleth. In 1402 Edmund Mortimer, Lord of Wigmore, who had been sent by Henry IV to put down the revolt, met the Welsh at Pilleth on Bryn Glas Hill. Owains army totally destroyed the English forces and captured Mortimer, who threw in his lot with Owain, eventually marrying his daughter. The Welsh revolt continued for several years under Owain and although it was finally suppressed, Owain evaded capture, disappearing into the mists of history and welsh legend. |
The Battle of Bannockburn by Brian Palmer. (PC) Robert the Bruces Scots army stand fast as the English knights attack. Robert the Bruce succeeds in defeating the English army at Stirling. With the full might of Englands army gathered before the besieged Stirling Castle, Edward II Plantagenate is confident of victory. To the west of Bannockburn, Robert Bruce, King of Scots, kneels to pray with his men and commends his soul to God. Patiently awaiting the coming onslaught in tightly packed schiltroms, his spearmen and archers are well prepared for battle. Unknown to the English, the open marsh of no mans land conceals hidden pits and calthrops, major obstacles for any mounted charge. Despite Cliffords and Beaumonts premature and unsuccessful attempt to relieve Stirling the day before, years of victory have caused the brave English knights to regard their Scottish foes with contempt. So, without waiting for the flower of the forest (archers) to weaken the enemy formations, the order is hurriedly given to attack! With one rush, hundreds of mounted knights led by the impetuous Earl of Gloucester, thunder headlong through the boggy ground straight for the impenetrable mass of spears, hurling themselves into defeat and death. With dash and courage the knights try to force a way through but the infantry stand firm. There is no room to manoeuvre. Everywhere horses and men crash to the ground. Casualties amongst the English nobility are horrific. Bruce seizes the moment and orders the exultant army to advance. The English recoil and are pushed back into the waters of the Bannockburn where many perish in the crush to escape the deadly melee. Edward II, his army destroyed, flees with his bodyguard for the safety of the castle but is refused refuge and has to fight his way south to England. For Robert Bruce and Scotland, victory is complete. |
The Battle of Stirling Bridge by Brian Palmer. (PC) After Edward 1st proclaimed himself King of Scotland Sir William Wallace rallied Scots in the South West and began attacking English occupying forces around Scotland. Edward I ordered the Earl of Surrey to put down the rebellion, after taking the surrender of rebel forces at Irvine the Earl of Surrey marched against William Wallaces forces at Stirling. He ordered his army to cross the narrow bridge over the Forth River near the Abbey of Cambuskenneth on September 11th. From a vantage point overlooking the bridge William Wallace watched and waited until the English army of 5,000 had crossed Stirling bridge and with the bridge being crowded with troops he launched his attack with his entire force wiping out the entire bridgehead. The rest of the English army fell back but William Wallace pursued. After this defeat English forces were evacuated south as far as the River Tweed. |
Battle of Culloden by Brian Palmer (PC) The Jacobite charge which broke through the ranks of Barrells regiment is counter charged by four British regiments including the 48th Legoniers regiment. |
Royal Scots at Waterloo by Brian Palmer. (PC) Royal Scots 1st of Foot about to form square around their colours during the Battle of Waterloo. |
Battle of the Little Big Horn (General Custer) by Brian Palmer. (PC) Last stand of General Custer at the Battle of Little Big Horn. General George Armstrong Custer and the 7th cavalrys last stand at the battle of Little Big Horn. |
Battle of Isandhlwana, 22nd January 1879 by Brian Palmer. (PC) Last stand of the 24th South Wales Borderers at Isandhlwana during the Zulu War. The battle of Isandhlwana, a Zulu victory over the British forces on 22nd January 1879 about 100km north of Durban. Lord Chelmsford led a column of forces to seek out the Zulu army camped at Isandhlwana, while patrols searched the district. After receiving a report, Chelmsford set forth at half strength, leaving six companies of the 24th Regiment, two guns, some Colonial Volunteers and a native contingent (in all about 1,800 troops) at the camp. Later that morning an advanced post warned of an approaching Zulu army. Shortly after this, thousands of Zulus were found hidden in a ravine by a mounted patrol but as the patrol set off to warn the camp, the Zulus followed. At the orders of the Camp Commander, troops spread out around the perimeter of the camp, but the Zulu army broke through their defences. The native contingent who fled during the attack were hunted down and killed. The remaining troops of the 24th Regiment, 534 soldiers and 21 officers, were killed where they fought. The Zulus left no one alive, taking no prisoners and leaving no wounded or missing. About 300 Africans and 50 Europeans escaped the attack. Consequently, the invasion of Zulu country was delayed while reinforcements arrived from Britain. |
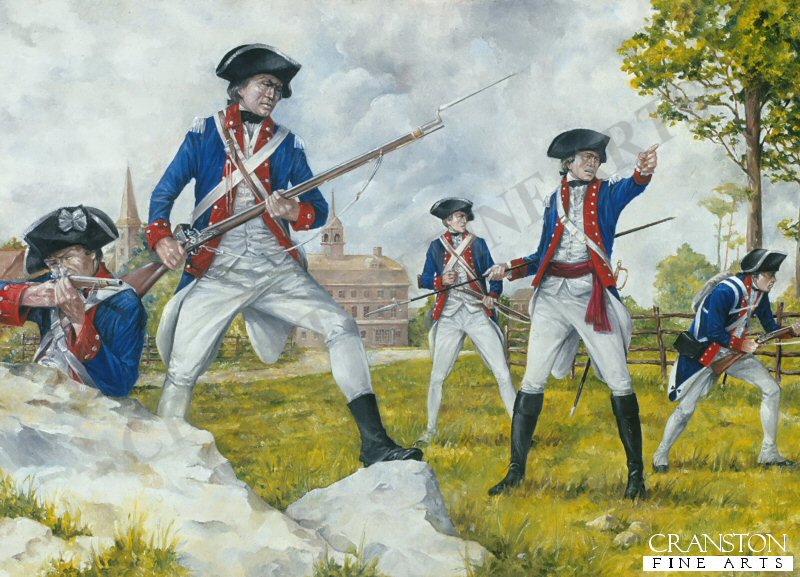
The 9th Regiment, at the Battle of Freeman's Farm, September 19th 1777 by Brian Palmer (PC) Taking over command of the British Northern Army in 1777, Lt Gen Burgoyne began a march to Albany to join forces with Lt Gen Sir William Howe. After taking Fort Ticonderoga on route he learned that Howe was leaving for Pennsylvania. Becoming desperately short on supplies he decided to press on the Albany regardless but found the road blocked by a Continental army under Maj Gen Horatio Gates. Burgoyne decided not to engage the enemys position frontally but to turn their left at Freeman's Farm. After a day of fierce fighting the British held the field but at a heavy price in casualties. On the 7th October the Colonial army, after receiving continual reinforcements attacked Howes position (the battle became known as Bemis Heights) and he was forced to retire to Saratoga. |
The Siege of Harfleur, 1415 by Brian Palmer. (PC) King Henry V of England leads his army at the siege of Harfleur in 1415. |
Ambush of the IX Legion by Brian Palmer. (PC) Driven by revenge for the brutal treatment she had suffered at the hands of the Romans, Queen Boadicea led the Iceni and her allies the Trinovantas in open revolt. The IX Legion Hispania was despatched to suppress the insurrection but were ambushed en route. Only the commander Petilius Cerealis, and a handful of cavalry escaped. |
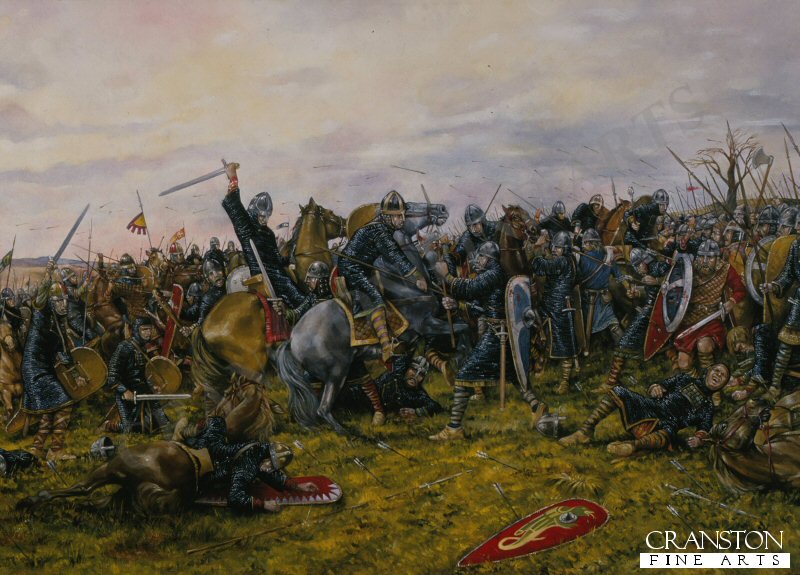
Battle of Hastings by Brian Palmer. (PC) The Battle of Hastings: While King Harold II was defeating the Norse invasion at the battle of Stamford Bridge in the north, the Norman invasion led by the Norman Duke William landed in the south. A Norman force of 7,000 warriors sailed across the English Channel in 450 flat boats and landed at Pevensey in Sussex on September 28th. The following two weeks saw the Norman army organising and raiding the local area for supplies. On hearing of the invasion, King Harold marched south from York to London, a distance of 200 miles, in seven days. And on October 13th with his army of 7,000 men took up position on Senlac Hill, 8 miles north of Hastings. Harold took this position as this was the direct route for London. The following day, the Normans attacked the village (which is now the town of Battle). The Battle of Hastings was a battle between King Harolds infantry and the Norman cavalry and archers. The Saxon line threw back the first charge of Norman knights and as the knights began retiring, the Saxons began to pursue the cavalry but a counter attack by Williams disciplined knights cut down the Saxon infantry. King Harold reformed his line before the second Norman cavalry attack was launched. For many hours King Harolds Saxon infantry held their ground against the repeated cavalry charges, both sides suffered heavy losses. As the evening progressed the battle turned the Normans way, William feigned a withdrawal of his cavalry, the Saxon infantry again could not resist to break ranks and pursue the cavalry. Halfway down the hill Williams knights turned and charged the Saxon infantry. King Harold at this time was mortally wounded from an arrow in the eye and the victory was won by the Normans. Each side lost a quarter of their men and during the fighting William the Conqueror had three horses killed under him. Later he ordered the building of Battle Abbey on the battlefield. The way was clear to London and William the Conqueror was crowned King of England on Christmas day at Westminster Abbey. |
Battle of Zama by Brian Palmer. (PC) Hannibal had invaded Italy by taking his army including war elephants across the mountains and into northern Italy. He defeated the Romans in three major battles including Cannae, but he did not take Rome when he had the chance. Once Rome had strengthened its forces, the Romans invaded Carthage. The second Punic War between Rome and Carthage was brought to a conclusion on the plains of Zama (modern Tunisia) with the Romans inflicting a crushing defeat on the army of Hannibal. |
The Iron Brigade During the Battle of Gettysburg, 1863 by Brian Palmer. (PC) The crack Iron Brigade of Brigadier General Wadsworths 1st Division of the army of the Potomac were the first Infantry unit to arrive on the field of Gettysburg in support of Brigadier General Bufords cavalry division who had stumbled upon General Lees advancing Army of North Virginia. The Brigade suffered 1,200 casualties out of 1800 engaged in the battle. |
51st (2nd Yorkshire, West Riding) Light Infantry at Waterloo June 1815. by Brian Palmer. (PC) No text for this item |
The Battle of Hastings - The Norman Lines by Brian Palmer. (PC) Norman infantry regroup as their cavalry go forward to meet the Saxons. |
Battle of Nagashino by Brian Palmer. (PC) When Portuguese traders took advantage of the constant violence in Japan to sell the Japanese their first firearms, one of the quickest to take advantage of this new technology was the powerful daimyo Oda Nobunaga. In 1575 the impetuous Takeda Katsuyori lay siege to Nagashino castle, a possession of an ally of Nobunagas, Tokugawa Ieyasu. An army was despatched to relieve the siege by Nobunaga and Ieyasu, two of the most influential figures in Japanese history, and the two sides faced each other across the plain of Shidarahara. The Takeda samurai were brave, loyal and renowned for their cavalry charges, but Nobunaga, counting on Katsuyoris impetuosity, had 3,000 musketeers waiting behind prepared defences for their assault. The outcome of this clash of tactics and technologies was to change the face of Japanese warfare forever. |
2nd Maryland Regiment at the Guildford Courthouse 1781 by Brian Palmer. (PC) No text for this item |
The 27th Foot (Inniskilling) at Waterloo by Brian Palmer (PC) Heroically standing their ground against the French Artillery the 27th were described after the battle as lying dead in a square. |
Charge of the 2nd Royal North British Dragoons (Scots Greys) at Waterloo by Brian Palmer. (PC) After the 2nd Royal North British Dragoons had charged the French artillery, they themselves were charged by the 3rd French Chasseur Chevals and the deadly 4th Regiment of Lancers. The scene depicted shows the French cavalry engaging the Scots Greys. |
|
Contact Details |
Sign Up To Our Newsletter!
This website is owned by Cranston Fine Arts. Torwood House, Torwoodhill Road, Rhu, Helensburgh, Scotland, G848LE Contact: Tel: (+44) (0) 1436 820269. Email: cranstonorders -at- outlook.com
|